We continually try to provide homeowners in the Joliet, Plainfield, Bolingbrook, Morris, and surrounding areas with resources. Being a homeowner is difficult.Every little bit helps. So here, we tackle one of those many tasks: installing a sump pump discharge line.
Installing a sump pump discharge line involves several steps. Here’s a detailed guide:
1. Gather Necessary Materials. Before starting, gather all necessary materials. This includes a sump pump, PVC pipes, a pop-up drain or bubbler pot, a hacksaw, PVC cement, and connectors.
2. Plan the Route. Plan the route for the discharge line. It should lead away from your home to prevent water damage⁷. Consider local regulations and avoid directing water towards neighboring properties².
3. Dig a Trench. Dig a trench along the planned route for the discharge line⁴. The depth of the trench depends on local frost lines and regulations⁷.
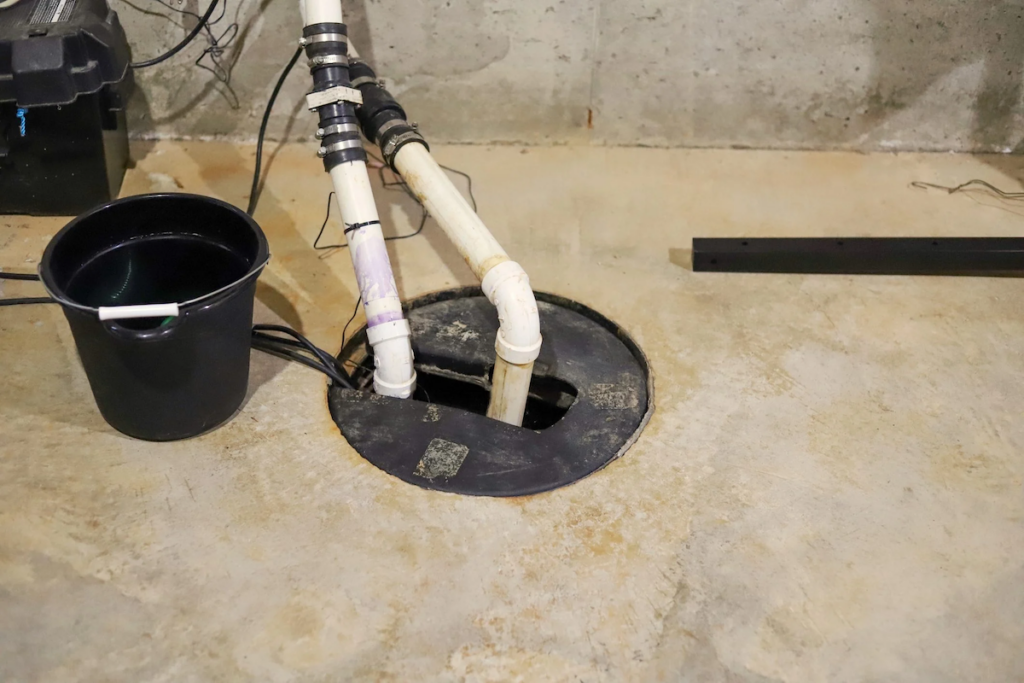
4. Connect the Pipe to the Sump Pump. Attach the discharge pipe to the outlet of your sump pump⁷. Use appropriate connectors and fittings to ensure a secure and watertight connection⁵.
5. Install a Vertical Discharge Pipe. Connect a short vertical length of PVC pipe to the sump pump⁶. It should reach the height of the intended penetration in the side of the house⁶.
6. Install a 90-Degree PVC Elbow. Glue a 90-degree PVC elbow to the short pipe⁶. This helps keep the discharge close to the ground⁵.
7. Attach Additional PVC Pipes. Attach additional PVC pipes and fittings to the discharger to route and “steer” the water flow away from your home⁵. Use PVC cement to glue them together⁵.
8. Ensure a Physical Air Gap. Make sure there is a physical air gap of one to two inches between the end of the sump pump pipe and the top of the drain tile³. This prevents water from backing up into the basement or crawlspace if the drain tile freezes³.
9. Lay the Pipe in the Trench. Place the pipe in the trench, following the planned route⁷. Make sure it sits securely in the trench and is aligned with the desired slope⁷.
10. Install a Pop-Up Drain or Bubbler Pot. Install a pop-up drain or bubbler pot at the end of the discharge line¹². This helps disperse the water evenly in your yard².
11. Test the System. Once everything is installed, test the system to ensure it’s working properly. If the water splashes out on the side, it’s better than flooding the house³. Remember, each installation can be unique due to different home layouts and local regulations. Always consult with a professional if you’re unsure about any step in the process. Safety should be your top priority.
Further Reading:
(1) How To Route Sump Pump Discharge (Quickly & Easily!) – Upgraded Home. https://upgradedhome.com/how-to-route-sump-pump-discharge/.
(2) How to Install a Sump Pump in 15 Steps – The Spruce. https://www.thespruce.com/how-to-install-sump-pumps-1398056.
(3) How Deep to Bury Sump Pump Discharge Line? A Comprehensive Guide. https://lambdageeks.com/how-deep-to-bury-sump-pump-discharge-line/.
(4) Sump Pump Discharge Line Installation | House to Yard. https://www.youtube.com/watch?v=jBGDPUYkbq4.